I will now give you a description of how I like to carve Blythe faces 🙂
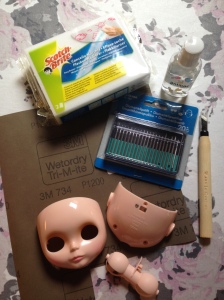
Materials:
Magic sponge and hand sanitizer.
Set of different diamond files
Carving knife from Cool Cat
Wet or dry sandpaper p800 and p1200 from 3M
Dremel, but this is optional 😉
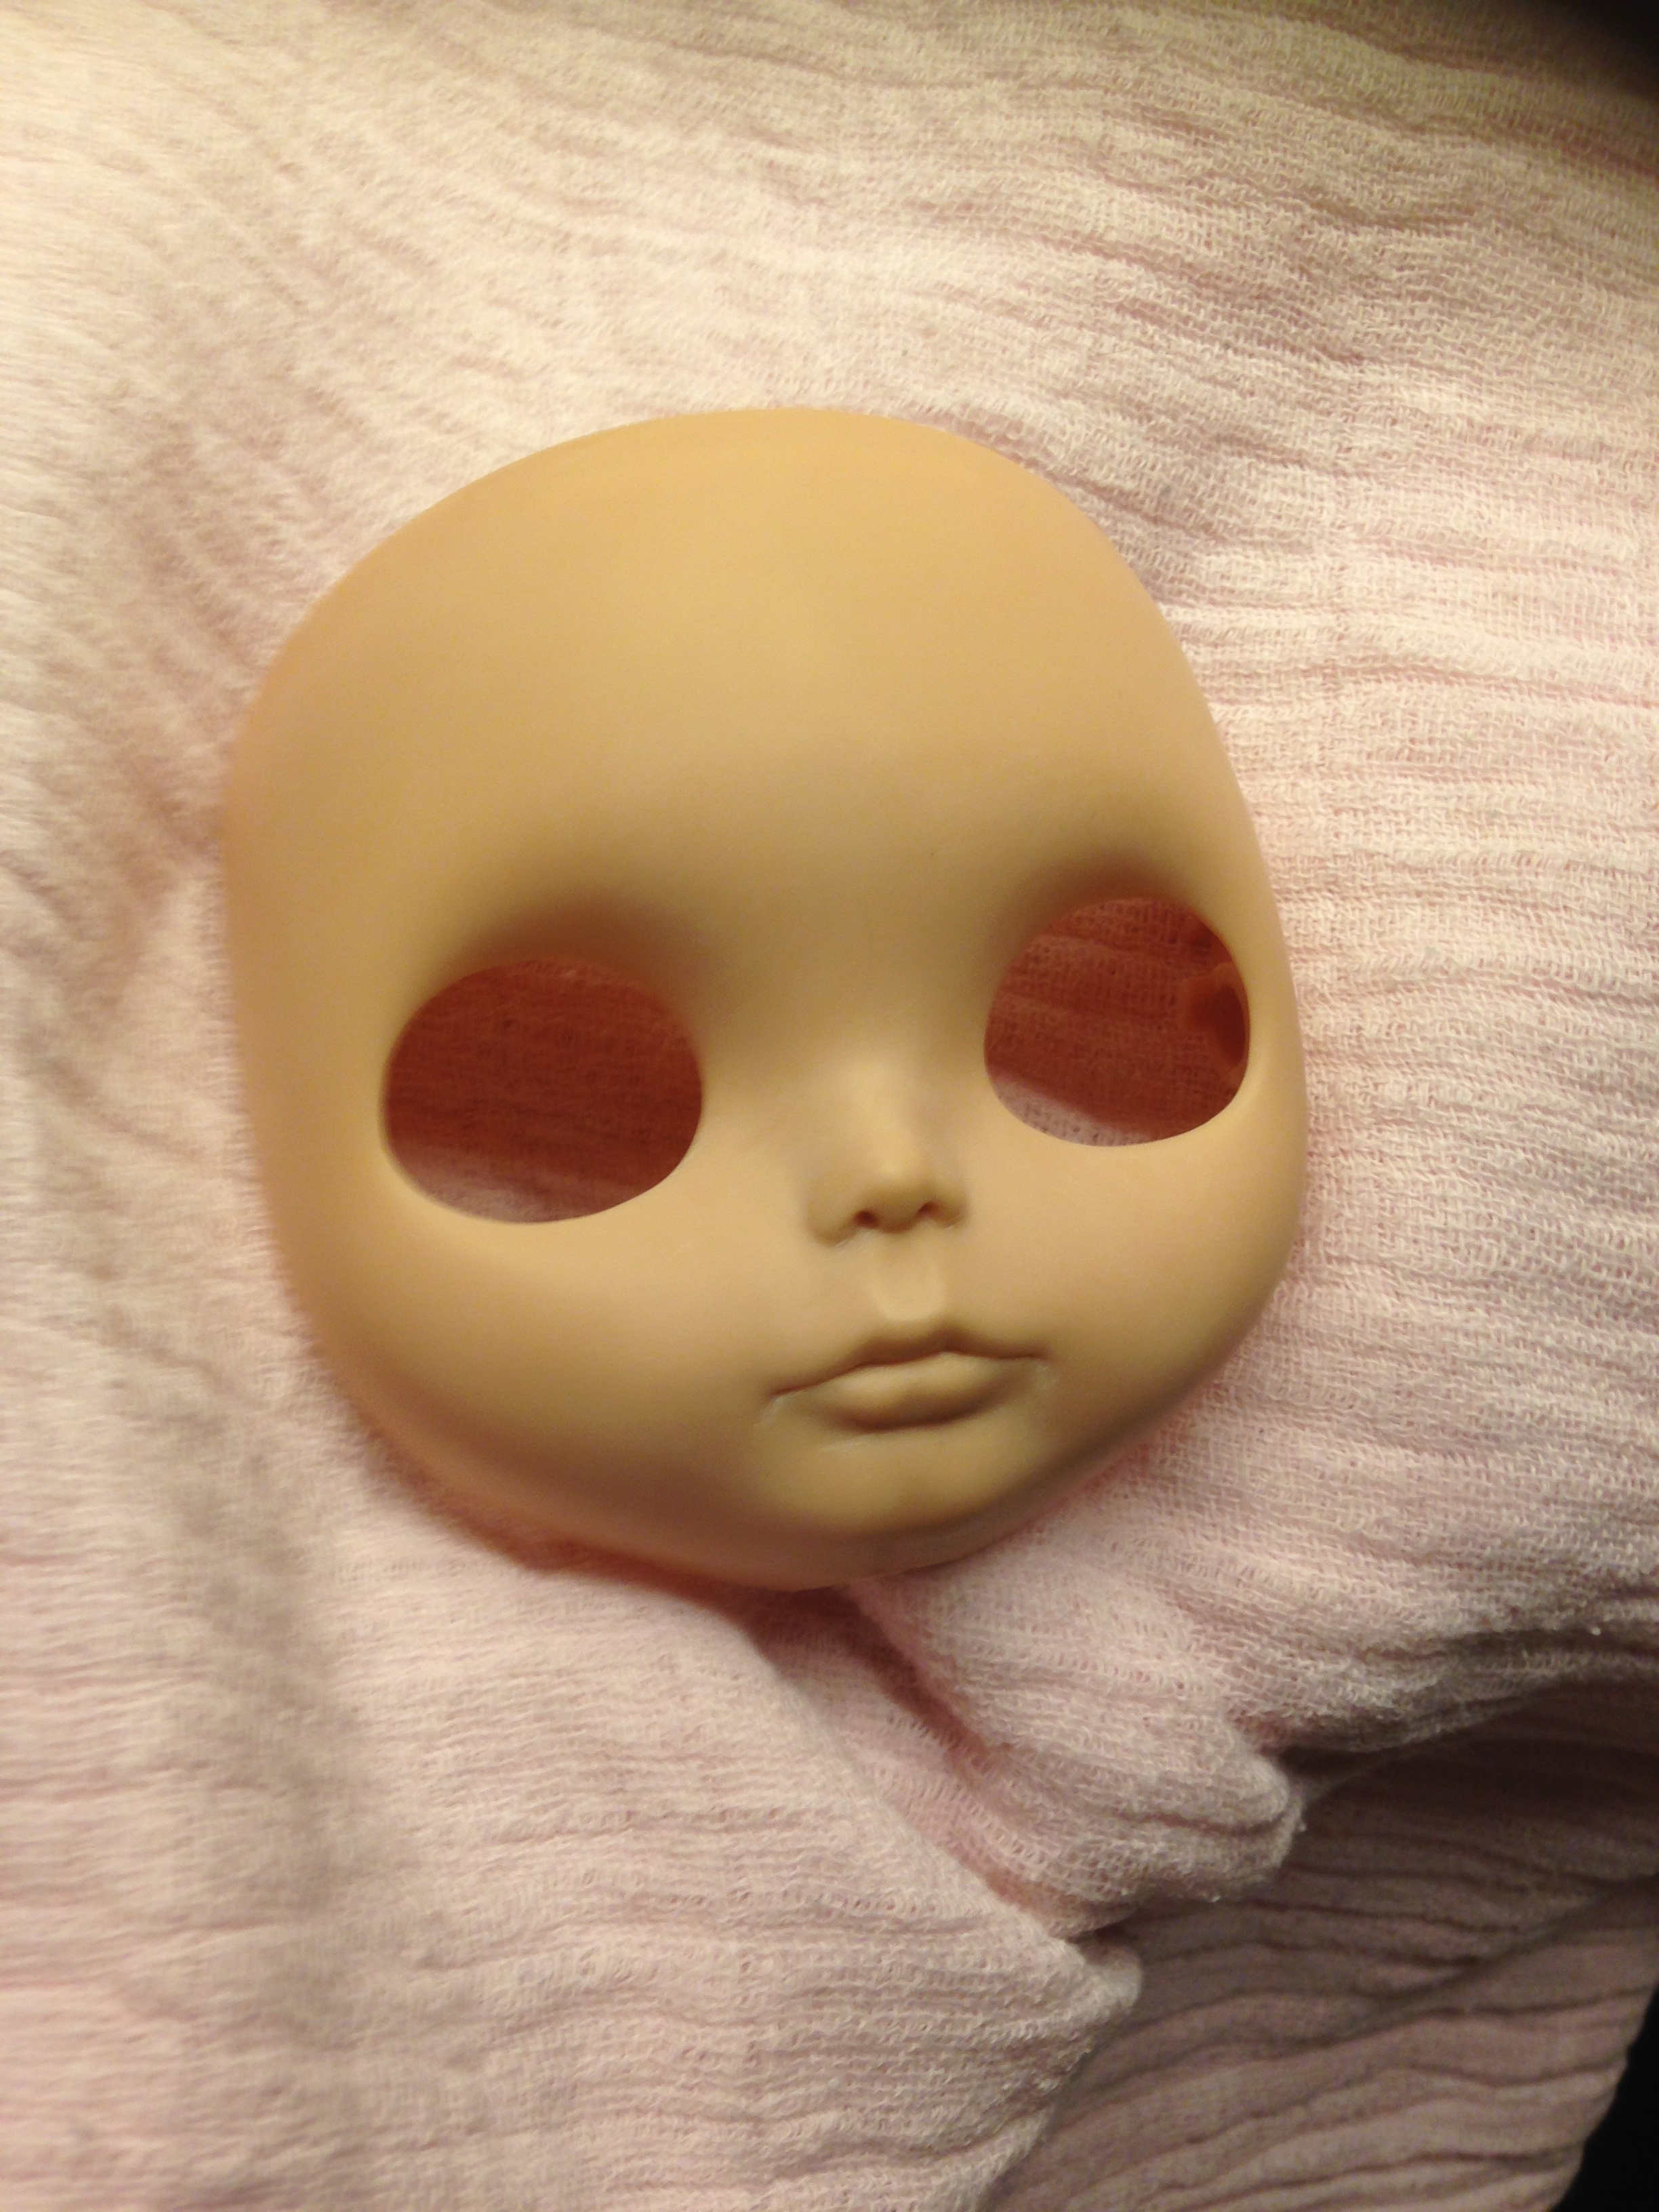
A Blythe face 😛
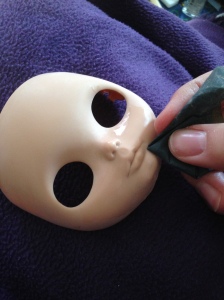
First I use my carving knife to carve the basic shape between the lips. So I will carve a deeper line in whatever shape I have chosen. It can help to look at a pictures of Blythes who has a similar shape to what you are after. I also now carve in to the side of the mouth to raise a smile or maybe a pouty look. I really love pouty looking Blythes ;). I use a smaller cut off piece of the sponge with some hand sanitizer on to wipe off bits of plastic so I can see what I’m doing. Also you don’t want to blow the plastic dust into the air, not good to breath in. It’s a good idea to use a suitable mask to avoid this, especially if you are dry sanding (I can recommend this thread for advice on respiratory protection: http://forums.dollymarket.net/showthread.php?tid=7255881).
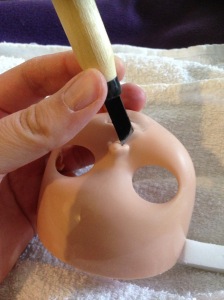
I will use the knife at different angles to carve in different places, you can just try and see what feel best for you. But I will show some pics of the angles I often use.

Here I twist my wrist so I follow the shape downward to get that line underneath the mouth that I like.
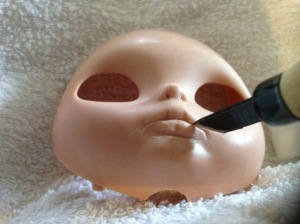
I usually use the tip to work on the line between the lips to get it deeper. Just remember to be careful if your Blythe is a RBL+ model as they have much thinner plastic and you don’t want to go through the plastic. I hold the faceplate up to the light to check, it’s easy to see then if you have some very light areas.
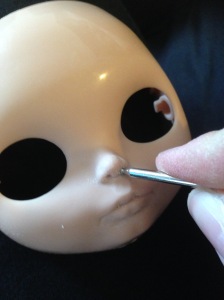
I use the tip of the knife and swirl the very point in a sirkular movement to carve nostrils. I use the tip to get small nostrils. A wider angle will give wider nostrils.
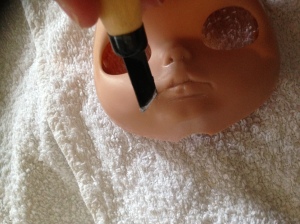
I use this side of the knife to dig out the angle of the mouth. Carefully so I don’t make uneccessary scratches in the area around.
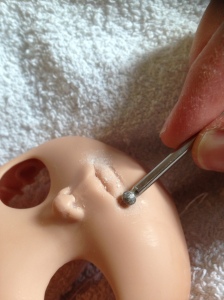
After I am happy with the general shape of the mouth and nose I will use different diamond files to work on different areas. I use the ball shaped ones to work on the philtrum and use sirklular movements over the mouth and nose. I also like the ball shaped files for making the lips a bit bigger sometimes, by shaping the lip upwards. I use pointed ones to get inside the nostrils, under the mouth and between the lips.
And I use a small ball shaped one in the nostrils ^-^.
Once I have evened out the bigger scratches and bumps with the files I will first use the p800 sandpaper to smooth out most of the scratches left. For a super smooth finish and removing any small scratches left, I use the p1200 sandpaper. I keep a bowl with water near and regularly dip the paper in to keep it wet. Doing it wet will avoid platic dust in the air and will give a smoother finish. I always use sirkular movements even with very fine sandpaper like this to make sure it will end up smooth. Just do this until you are happy :). I check in good light to see if any scratches are left. I also sand the backplate and eyelids in preparation for the next step.
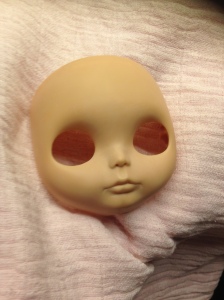
Here she is now :). I will still check again in the brighter daylight tomorrow to be sure she is really done ;).
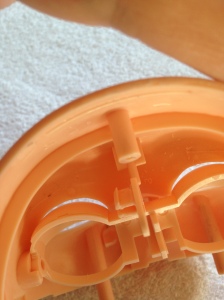
Also before doing any faceup work I will sort out the eyelids so they don’t show when the eyes are open and scrape off a layer of plastic at the top of the eye hole to allow space for paint or decoupage (for those who would like to do that) on the eyelid. I already have a tutorial on flickr regarding opening a RBL, boggling, sleep eyes, and eyechip removal. I will post it here on the blog at some point :). But you can find it in my flickr albums.
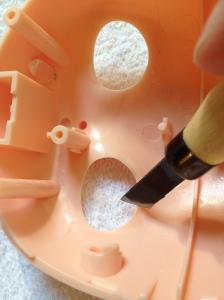
This is a pic I have taken previously :). Just scrape off some plastic carefully and wet sand it after. I also pop the eyelids back in to check if I have made enough space. You really don’t want to end up scraping off the eyelid paint you have been working hard on.
If there are any more questions I am happy to help. I might have forgotten something as well ;).
Edit: Since making this tutorial I have begun to use a dremel. But I basically do the same as I did before, only with the diamond files attached to the dremel, and faster than I could do manually. It’s best to wait with the dremel until you feel quite confident carving manually. You can slip easily and make big damages quickly. So you need to have steady hands, be awake and focused to use one. Also always use a protection mask when using a dremel as the plastic dust flies around everywhere, and you can easily breathe it in. One of the girls I did mostly using a dremel:

Thank you for reading. Hugs to everyone :D.